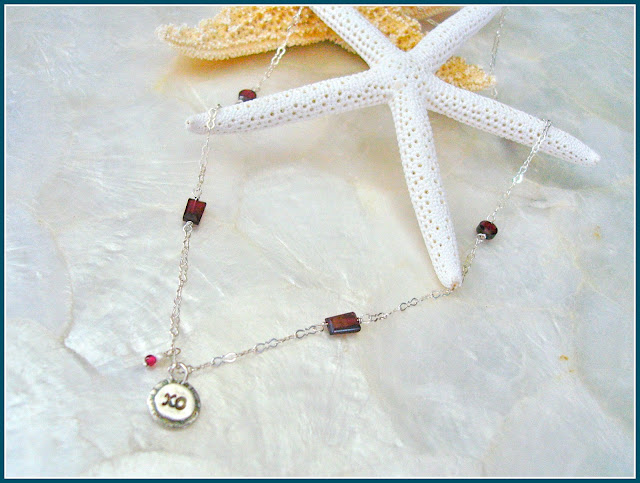
Xs & Os Necklace
I thought I'd take you through my process in creating a new design. New designs come to me at all hours of the day, many at the most inopportune times, so I have paper and ink scattered throughout the house, in the car, and in my purse! They come to me in my dreams, in that fog between waking and sleep, and sporadically throughout the day. Sometimes I'll sketch new ideas in my design book and sometimes they'll just haunt my brain until I bring them to life, either way they eventually become a tangible thing. This particular design came to me a couple of days ago as I was creating another Valentine's Day design (a pair of earrings ). The photos above will give visual affirmation to the process of creating this necklace from start to finish : )
So clearly the moment of conception begins in my brain and unfortunately, I can't really show you that, but once the idea has formed my hands go to work. This necklace involves PMC (precious metal clay) which in a nutshell is tiny particles of recycled pure silver suspended in an organic material creating a clay-like base that can be formed and/or cut into shapes and impressed with patterns that once fired (either by torch or in a kiln, I'll be using a torch today) the organic matter is burned away leaves behind .999 fine silver (pure silver). And since this a design for a necklace and the design requires a handcrafted chain complete with gemstones, I'll be wire wrapping rhodolite garnet beads, I'll be illustrating both.
First I lay out the items I'll need to prepare the "XO" charm then I lube everything up with olive oil to keep the clay from sticking. I cut the amount needed from the pat of clay, roll it out to the proper thickness, impress the pattern for the base and xo for the top then cut them out with circular cutters, remove the excess clay and place the pieces over a warming plate to dry. Once the clay is leather hard I remove it from the warming plate, sand the ragged edges and smooth the surfaces, place on my firing board and torch away. After firing I quench and dry them then run a wire brush over them to remove the fire scale and check of any unfinished areas. When I'm satisfied with the result drop them in the tumbler to polish to a brilliant shine : ) At this point depending upon the application, they are either ready for placement or in this case a dip in liver of sulfur for oxidation, once they've reached the desired depth of color they are rinsed dried and polished once again to reveal texture and detail and added to the other components. Now it's time to make the chain, so I measure and cut all of my wire and chain to size and begin wrapping, forming, and stringing until my creation is complete. I'm a bit obsessed with detail, so I meticulously choose each gemstone to best compliment the others!
Throughout the entire process I'm listening to calm soothing music. The process of design/creation is very meditative for me and whether you believe that an artist adds a bit of their own vibration and spirit to each piece or not, I want to make certain that your jewelry feels as good as it looks! So there you have it, a finished necklace. Different designs require different amounts of time for completion depending on the amount of detail (this one took several hours). However once a piece is finished it's really only the middle of it's journey! It still needs to be displayed, photographed, priced, listed, and hung until it's purchased, boxed, shipped, and finally opened and worn by it's new owner.


